The HIPAA Enrollment Master can be automated through a scheduler. A scheduler is software that can be programmed to execute a certain task at a certain time repeatedly. Windows has such a scheduler built in.
The Windows scheduler can be used to let the HIPAA Enrollment Master execute in regular intervals without user intervention. Usually one would let the HIPAA Enrollment Master scan a directory and then print, create image files or export the data and remove the files to prevent duplicate processing.
Use the command line with the appropriate options as described in Using Command Line Arguments (CLI).
Note: Please consult Windows help files for further information on setting up the scheduler.
1. If the task scheduler is installed on your system, you will find it in the Administrative Tools menu. To open the Task Scheduler, click Start ![]() Aministrative Tools
Aministrative Tools ![]() Scheduled Tasks.
Scheduled Tasks.
Note: In different Windows versions, the way to access the Task Scheduler can differ. Consult your Windows version documentation.
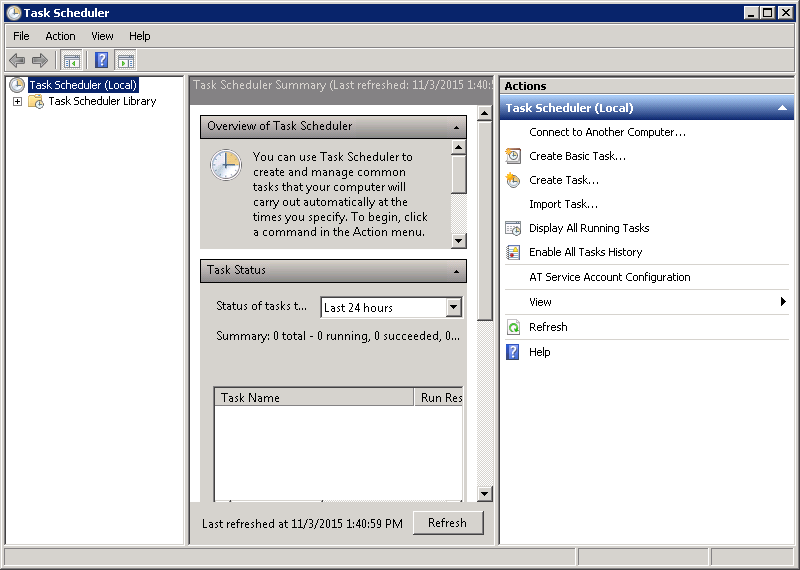
The Windows Task Scheduler
2. Click on "Create Basic Task" in the Actions menu and the "Create Basic Task Wizard" will guide you through the setup process.
3. Fill in a name and description for the new task.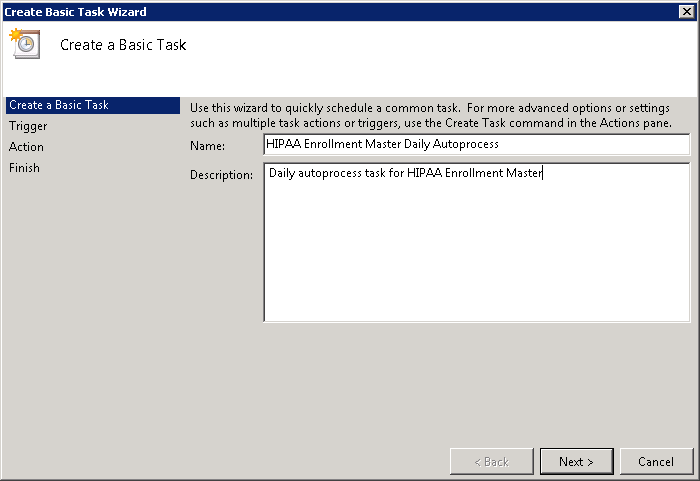
The "Create Basic Task Wizard" window
4. Set the Task Trigger to the desired repetition interval.
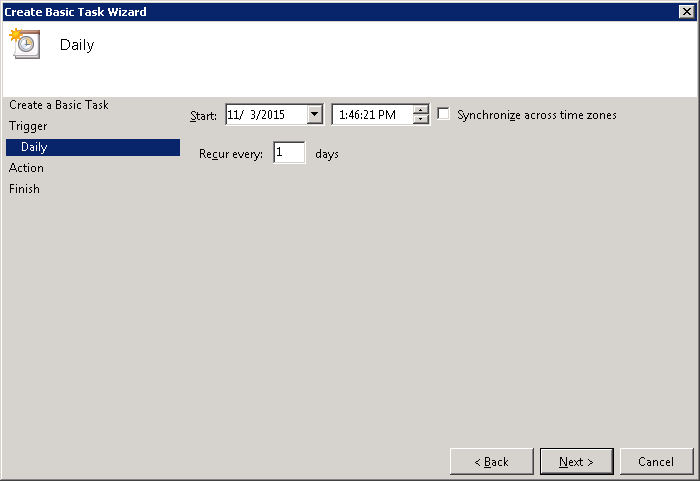
Setting a time interval
5. Select the "Start a Program" action.
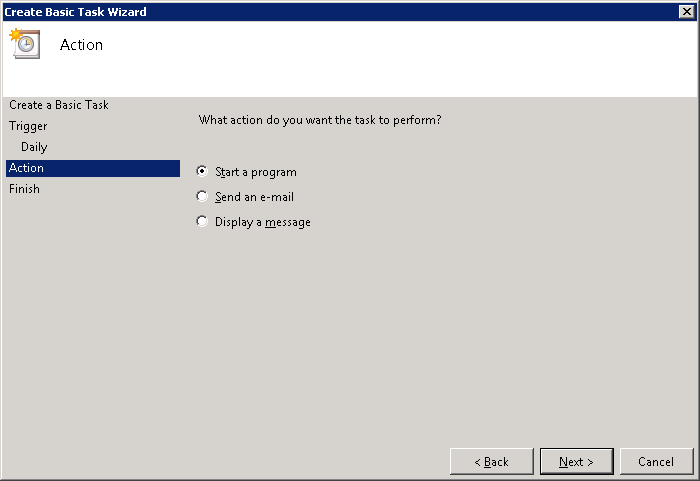
Selecting an action
6. Select the HIPAA Enrollment Master and type in your desired command line arguments. The default location for the HIPAAEnrollmentMaster.exe executable file is "C:\Program Files\HIPAAsuite\HIPAA Enrollment Master\".
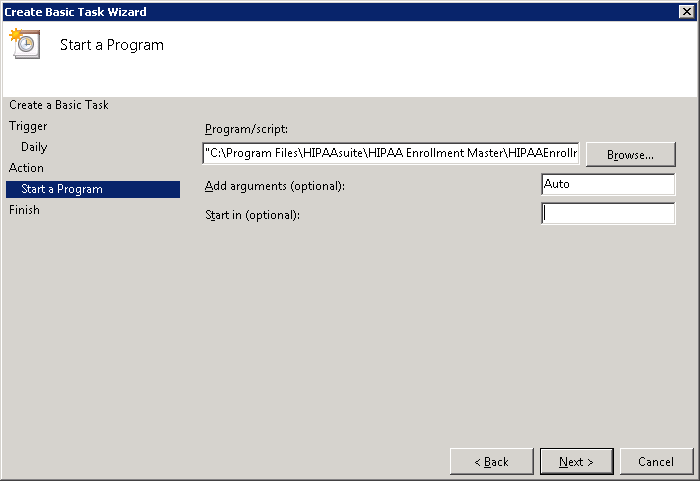
Selecting the executable and command line arguments
7. In the last screen, make sure you have specified all data correctly. Click "Finish" to save your task.

Summary window
8. The scheduled task has been added to the system. You can now edit the task by right-clicking it and selecting "Properties" from the context menu. Here you will be able to specify additional parameters for the scheduled file, such as what user account to use to run the executable and to run only when the computer has been idle for a set amount of time.